Oh, why hello there! It’s been a minute and I’ve definitely missed you all. In a short span of 2 months, I got engaged, married, and moved across to country to sunny Arizona! My socially distant party tutorials have gotten the shaft, but I trust that you have been having fabulous socially distant fun in the interim. Before my trifecta of life changes, I partnered up with Oh Happy Day to create the finale in my Party-in-Place tutorial series, and we settled on something very covid-friendly, awesome, and fashionably speaking.. all the rage: tie-dye! All the decor & tabletop items can be found in their Oh Happy Day Party Shop (linked below)!


This party was extra special to me because I did it in Michigan with my nieces 2 days before we left for Arizona; and specifically for my 12 year old niece that had a shelter-in-place birthday parade in May during the peak of Michigan’s coronavirus prevalence. I am super close to my nieces, so it was extra special to leave on a very high note.
Oh Happy Day has an awesome watercolor fans tutorial for white tissue decor that I followed with some small changes, and also added honeycombs and garlands to the mix.
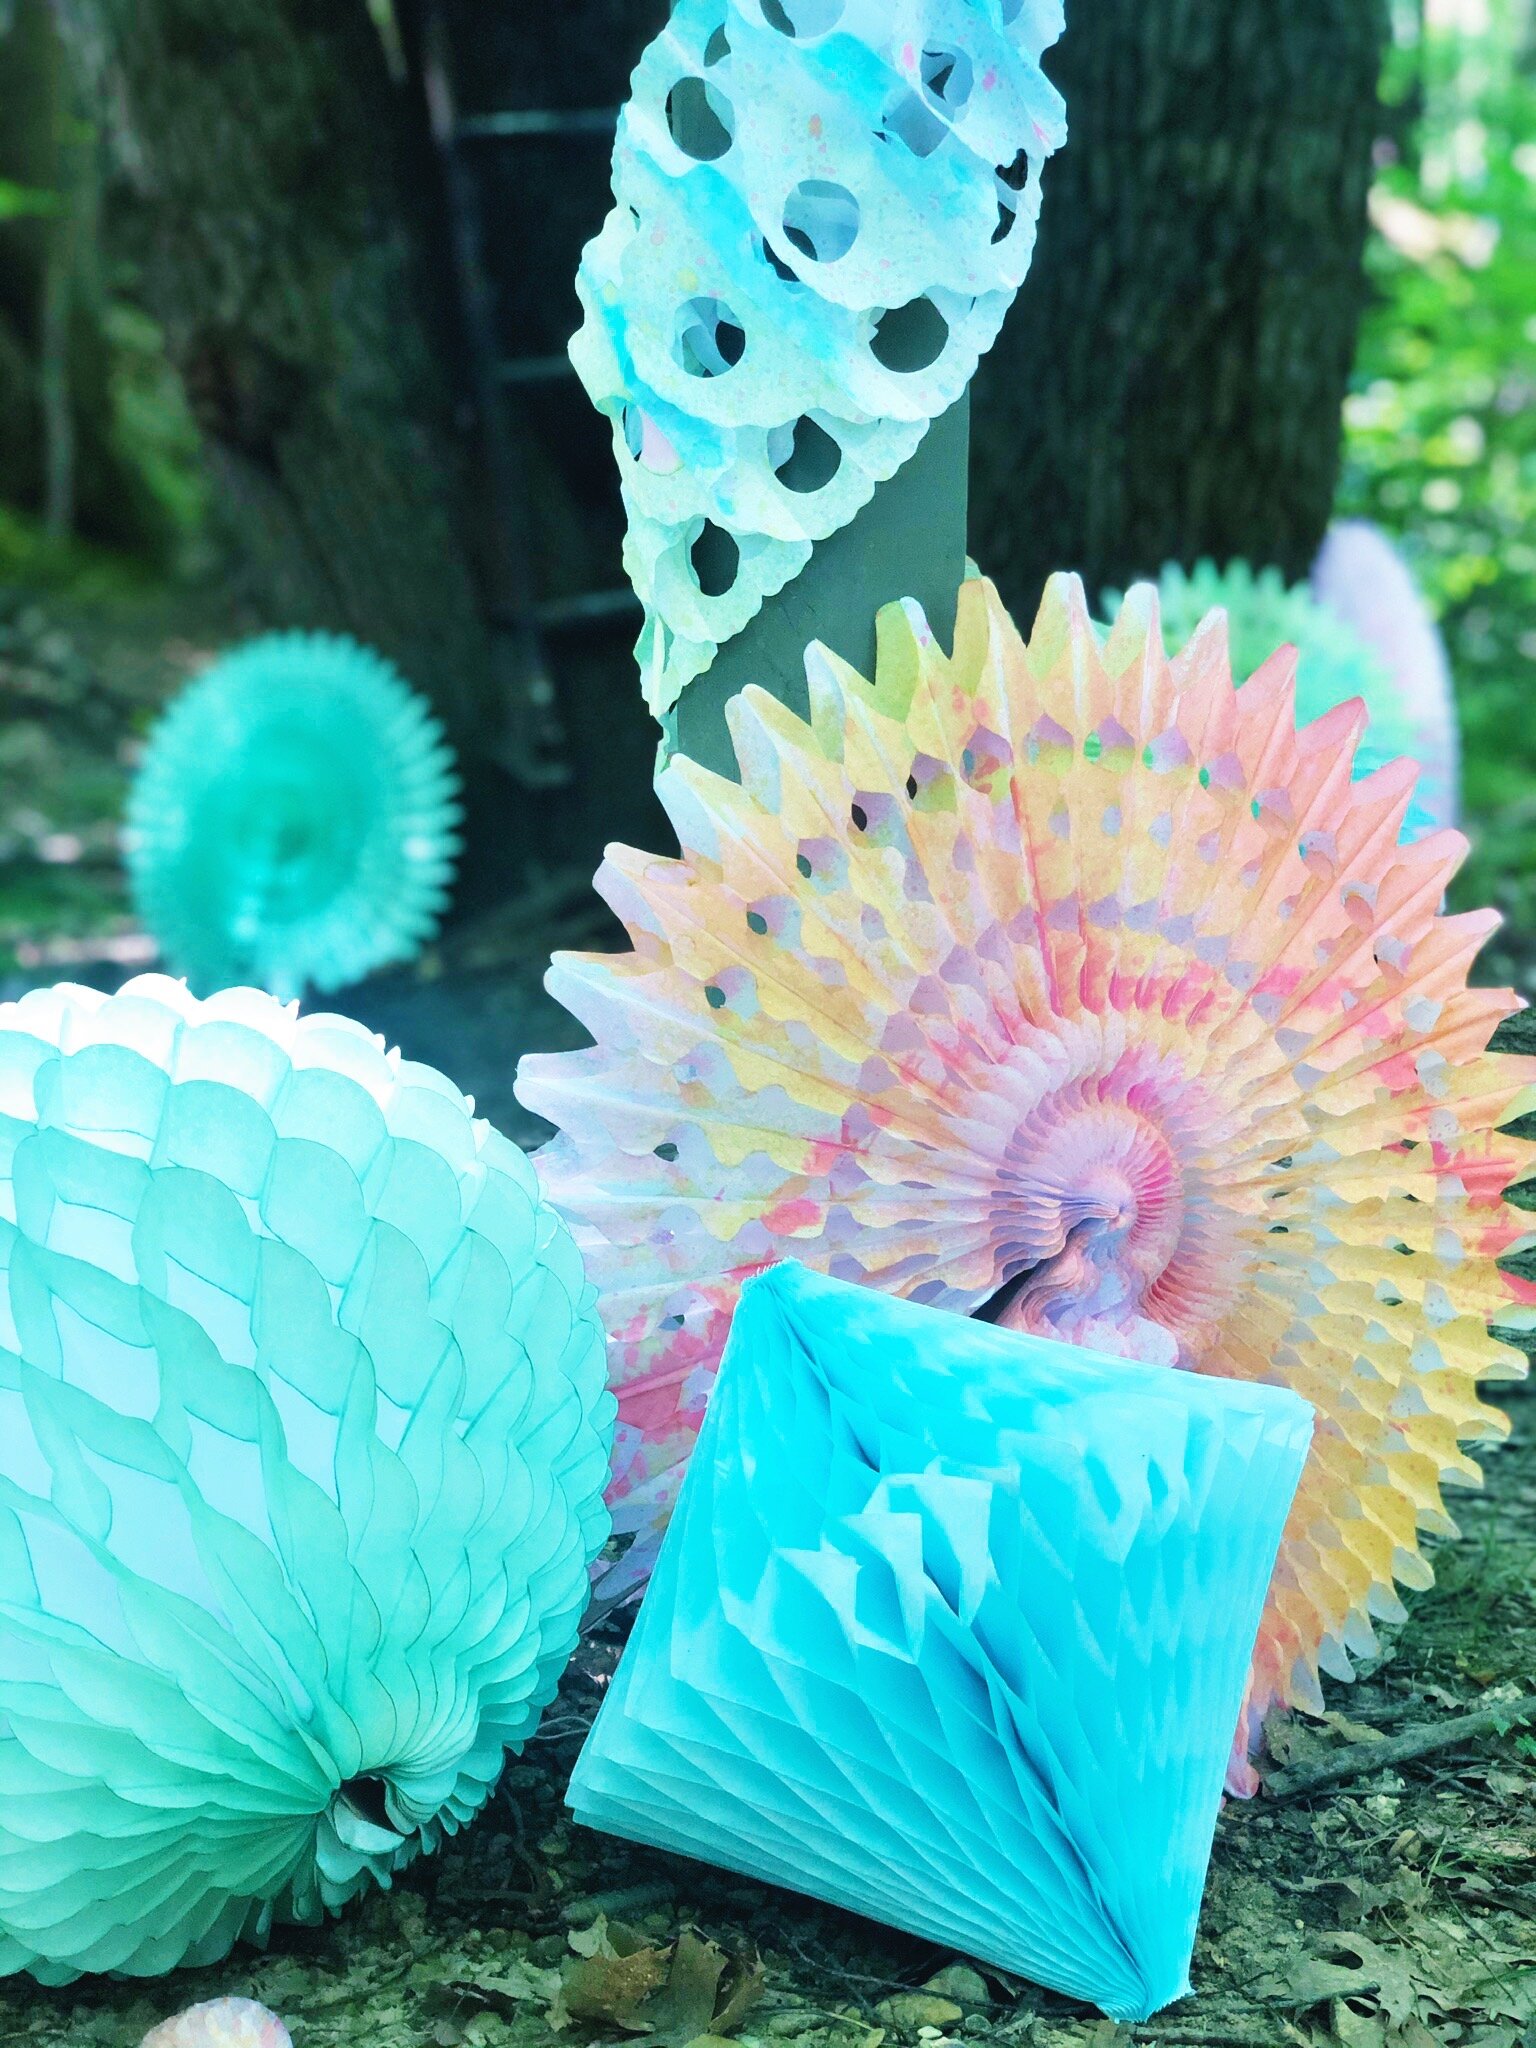
The original tutorial calls for India Ink to dye the fans, but I didn’t have any (and it’s $35) so I substituted that for good old Wilton Gel Food Colors and the results were pretty great! It’s a little more difficult to manipulate the colors with food coloring, but I wanted the tie-dye to be slightly muted. Vary the concentrations of your water/food coloring and the consistency of the stream on your spray bottles. In the end, use a more concentrated solutions and the stream mode (not spray or mist) to spray on some harsher lines to give it those quintessential tie-dye characteristics.
To dye the honeycombs, open them up and just use a little scotch tape to keep them from closing (not the adhesive tabs they come with… save those for your actual event). Make sure you rotate them as you spray so that you don’t have a gap of white.

Like the tutorial states, try to separate warm and cool colors so that they don’t mix and produce brown splotches and make your decor look dirty. After they partially dried, if I found white spots, I would add a contrasting color… a little blue on a warm palette, or a little pink on a cool palette, and I liked the variety that produced. Also be sure not to over spray, if your tissue gets too saturated, it will be more likely to rip. Alternate the settings of the spray bottles to get less uniform patterns, and be sure to partially dry your decor opened, and then close them for the remainder of the drying. The streamers are definitely harder to close, but with a little patience (and a second set of hands, if possible), it’s definitely doable.
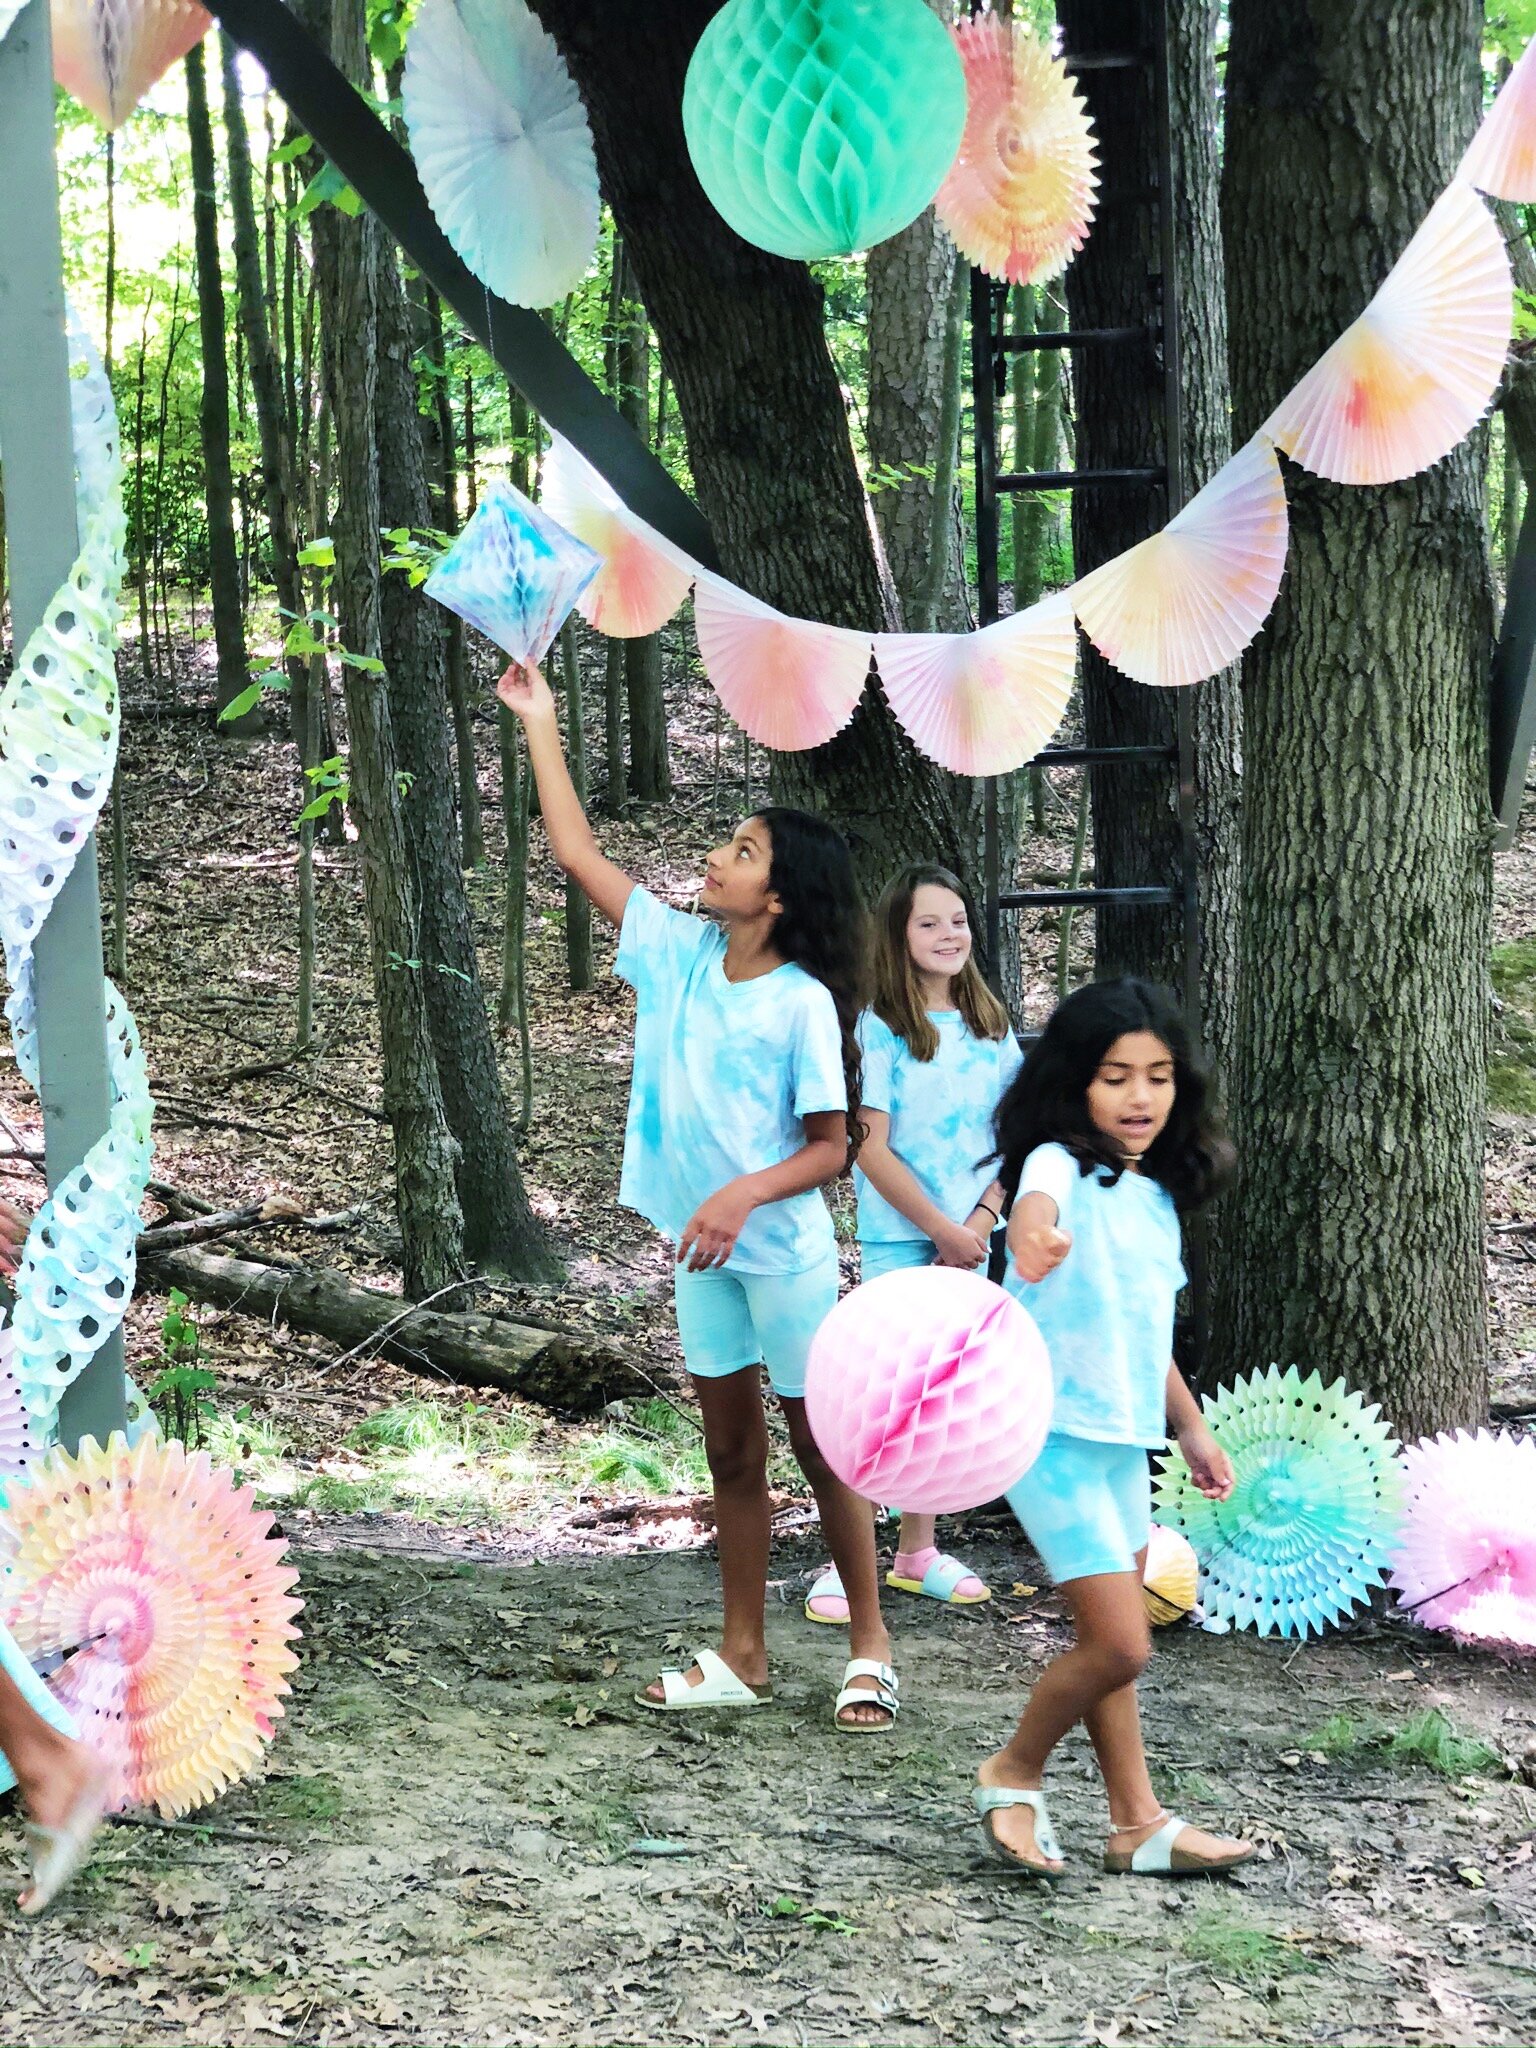
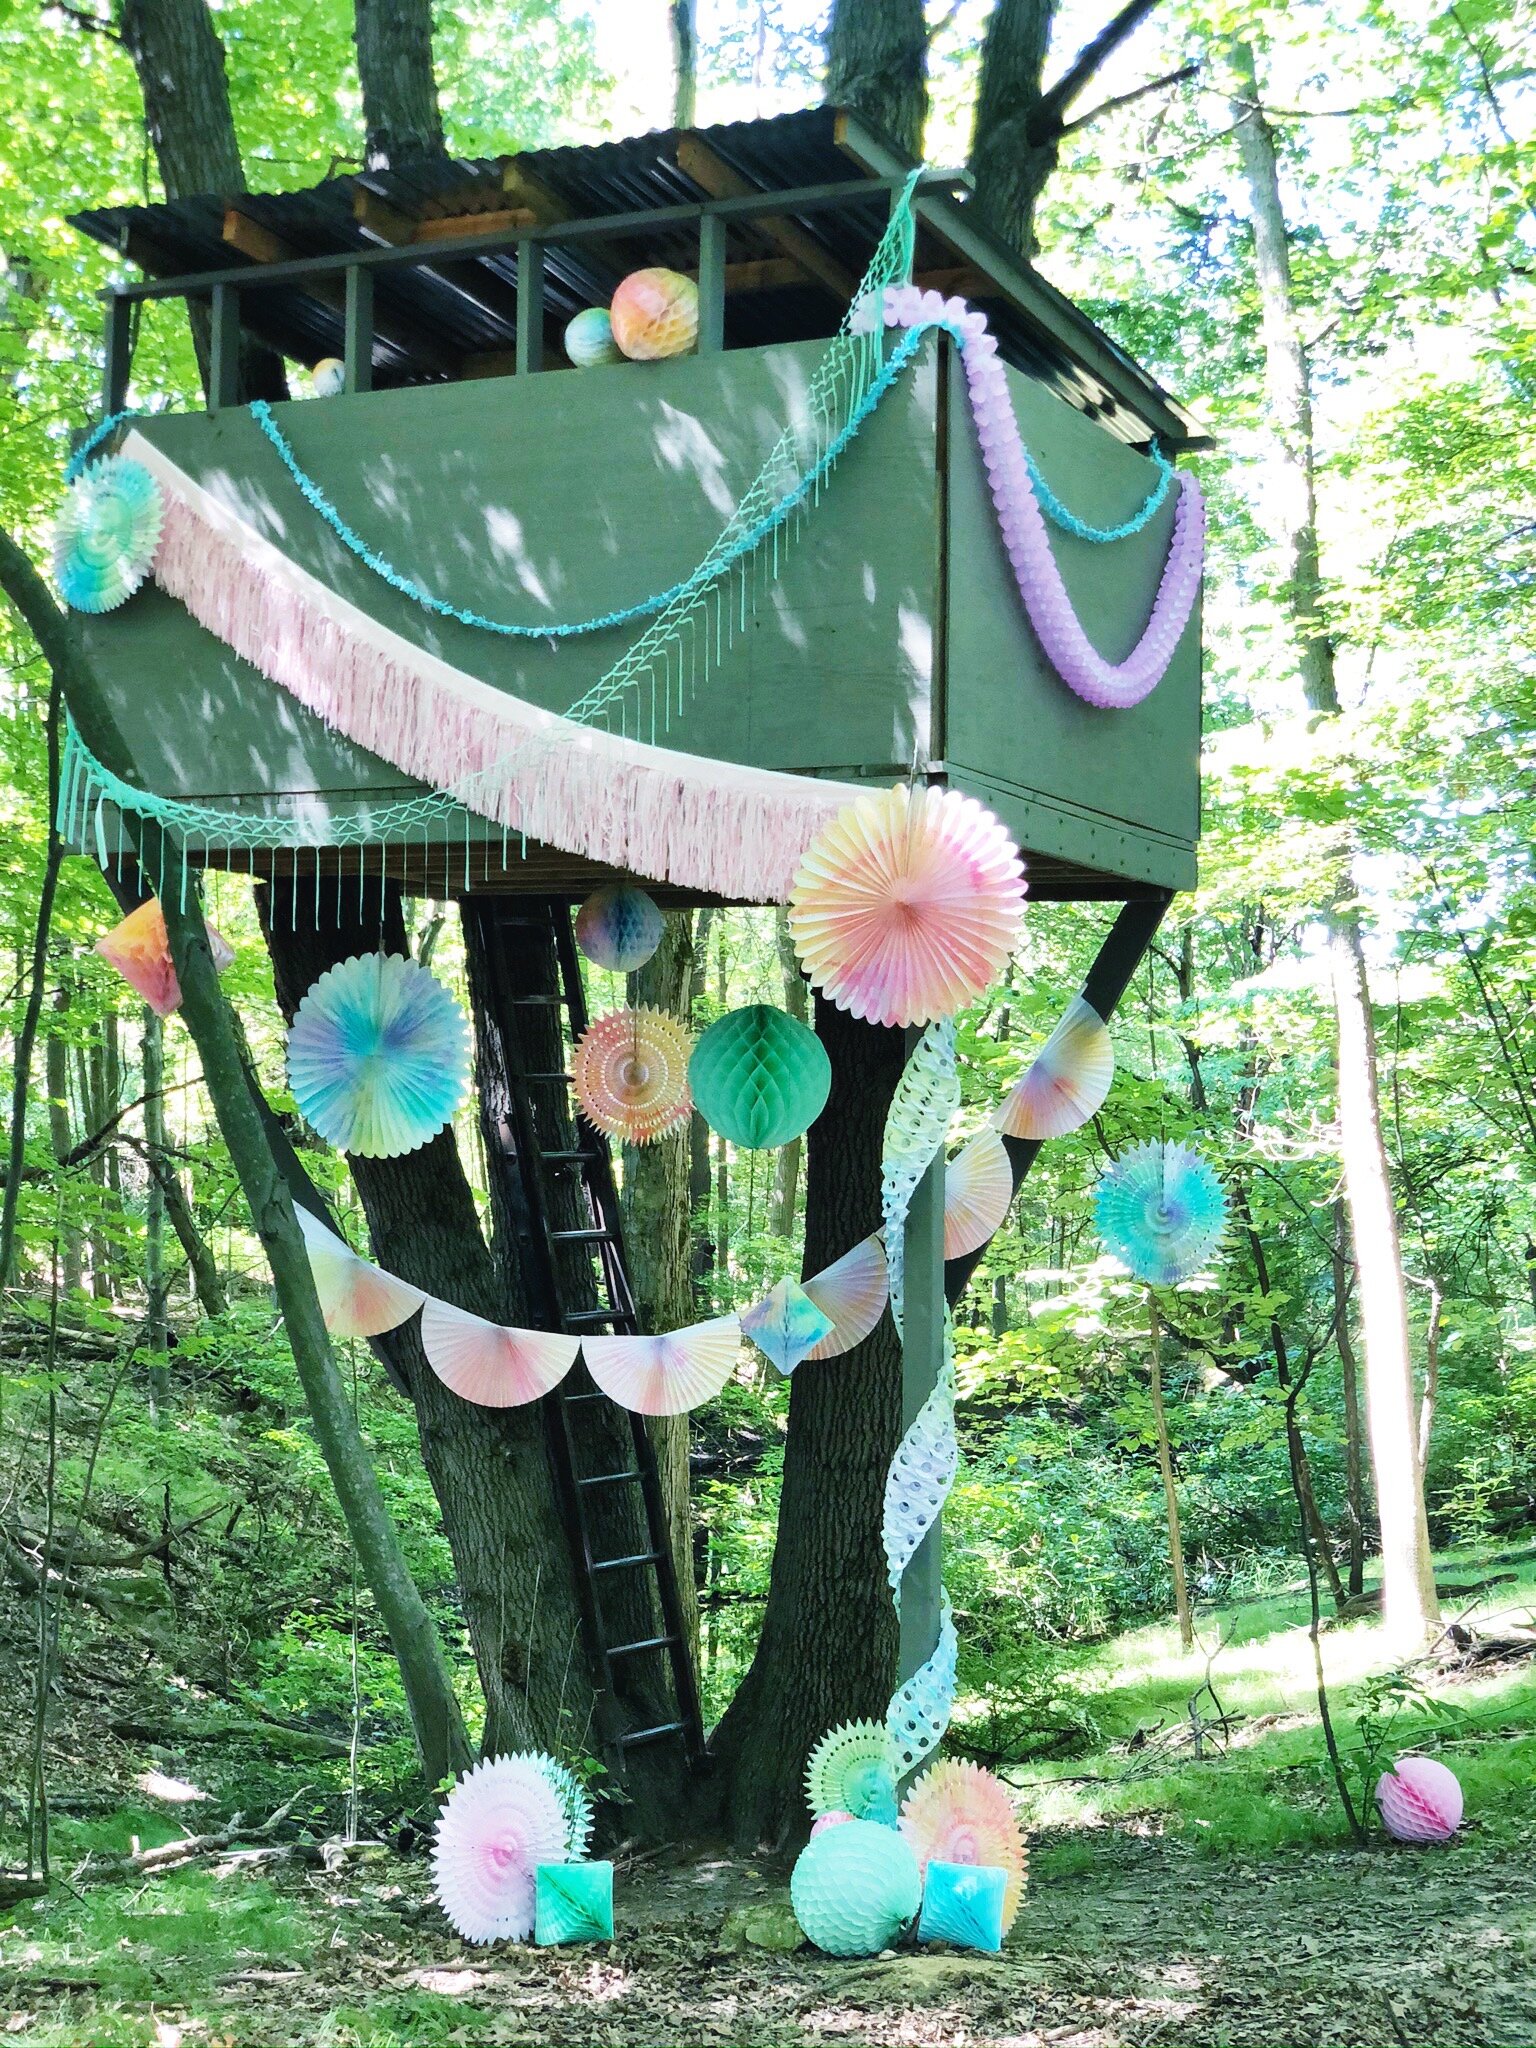
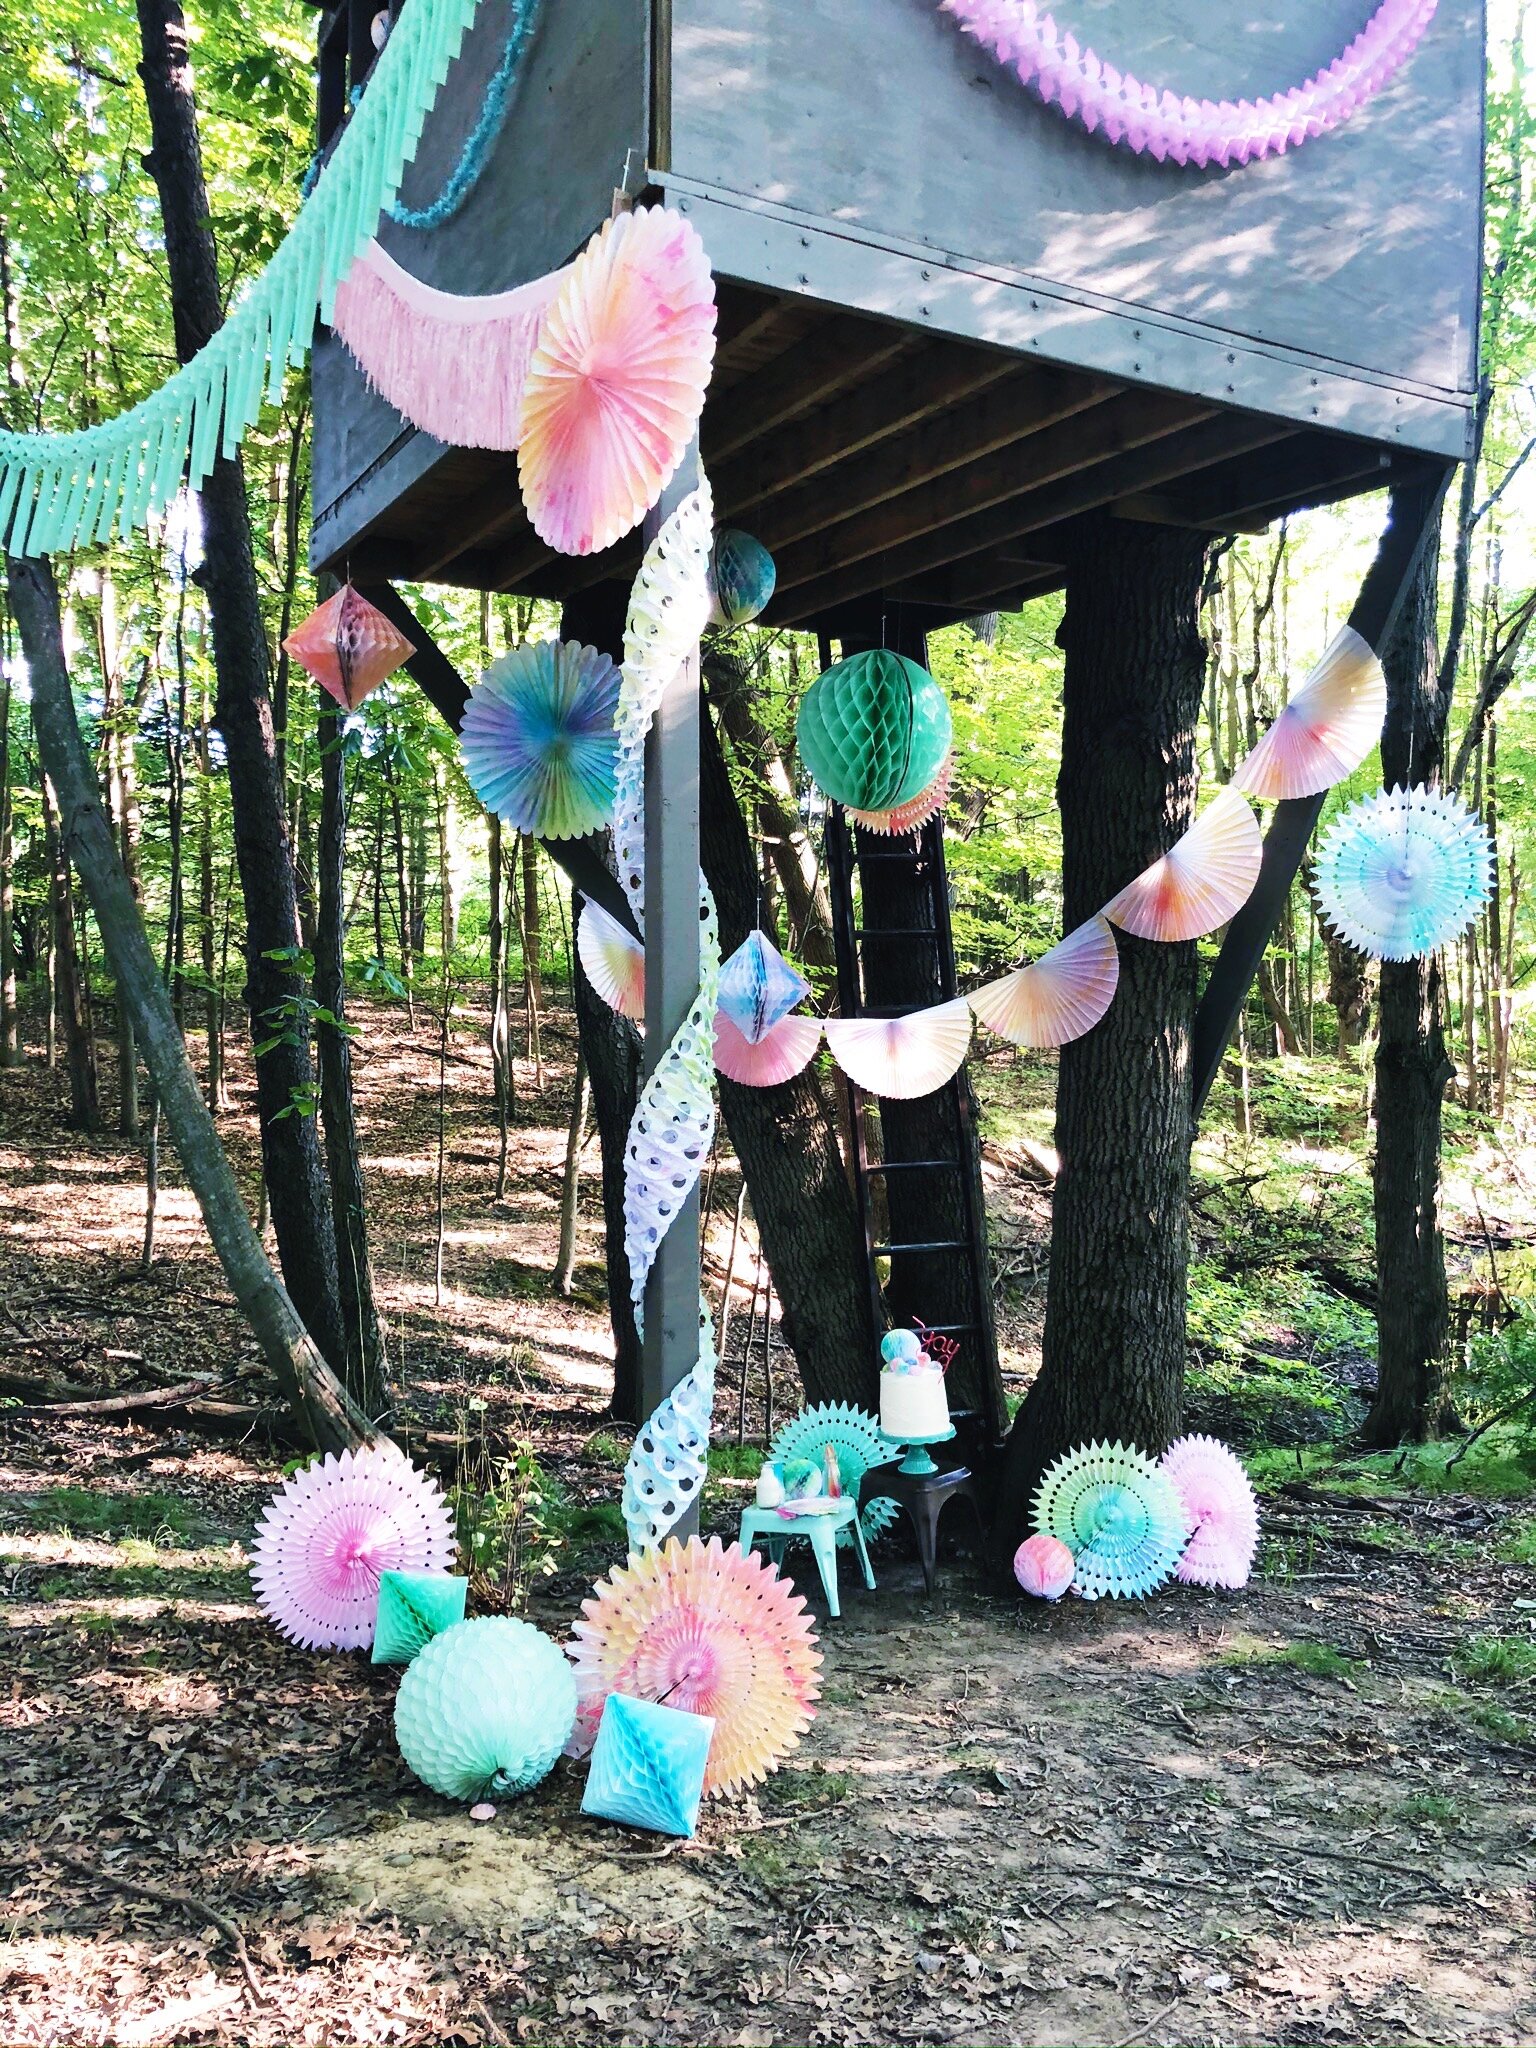
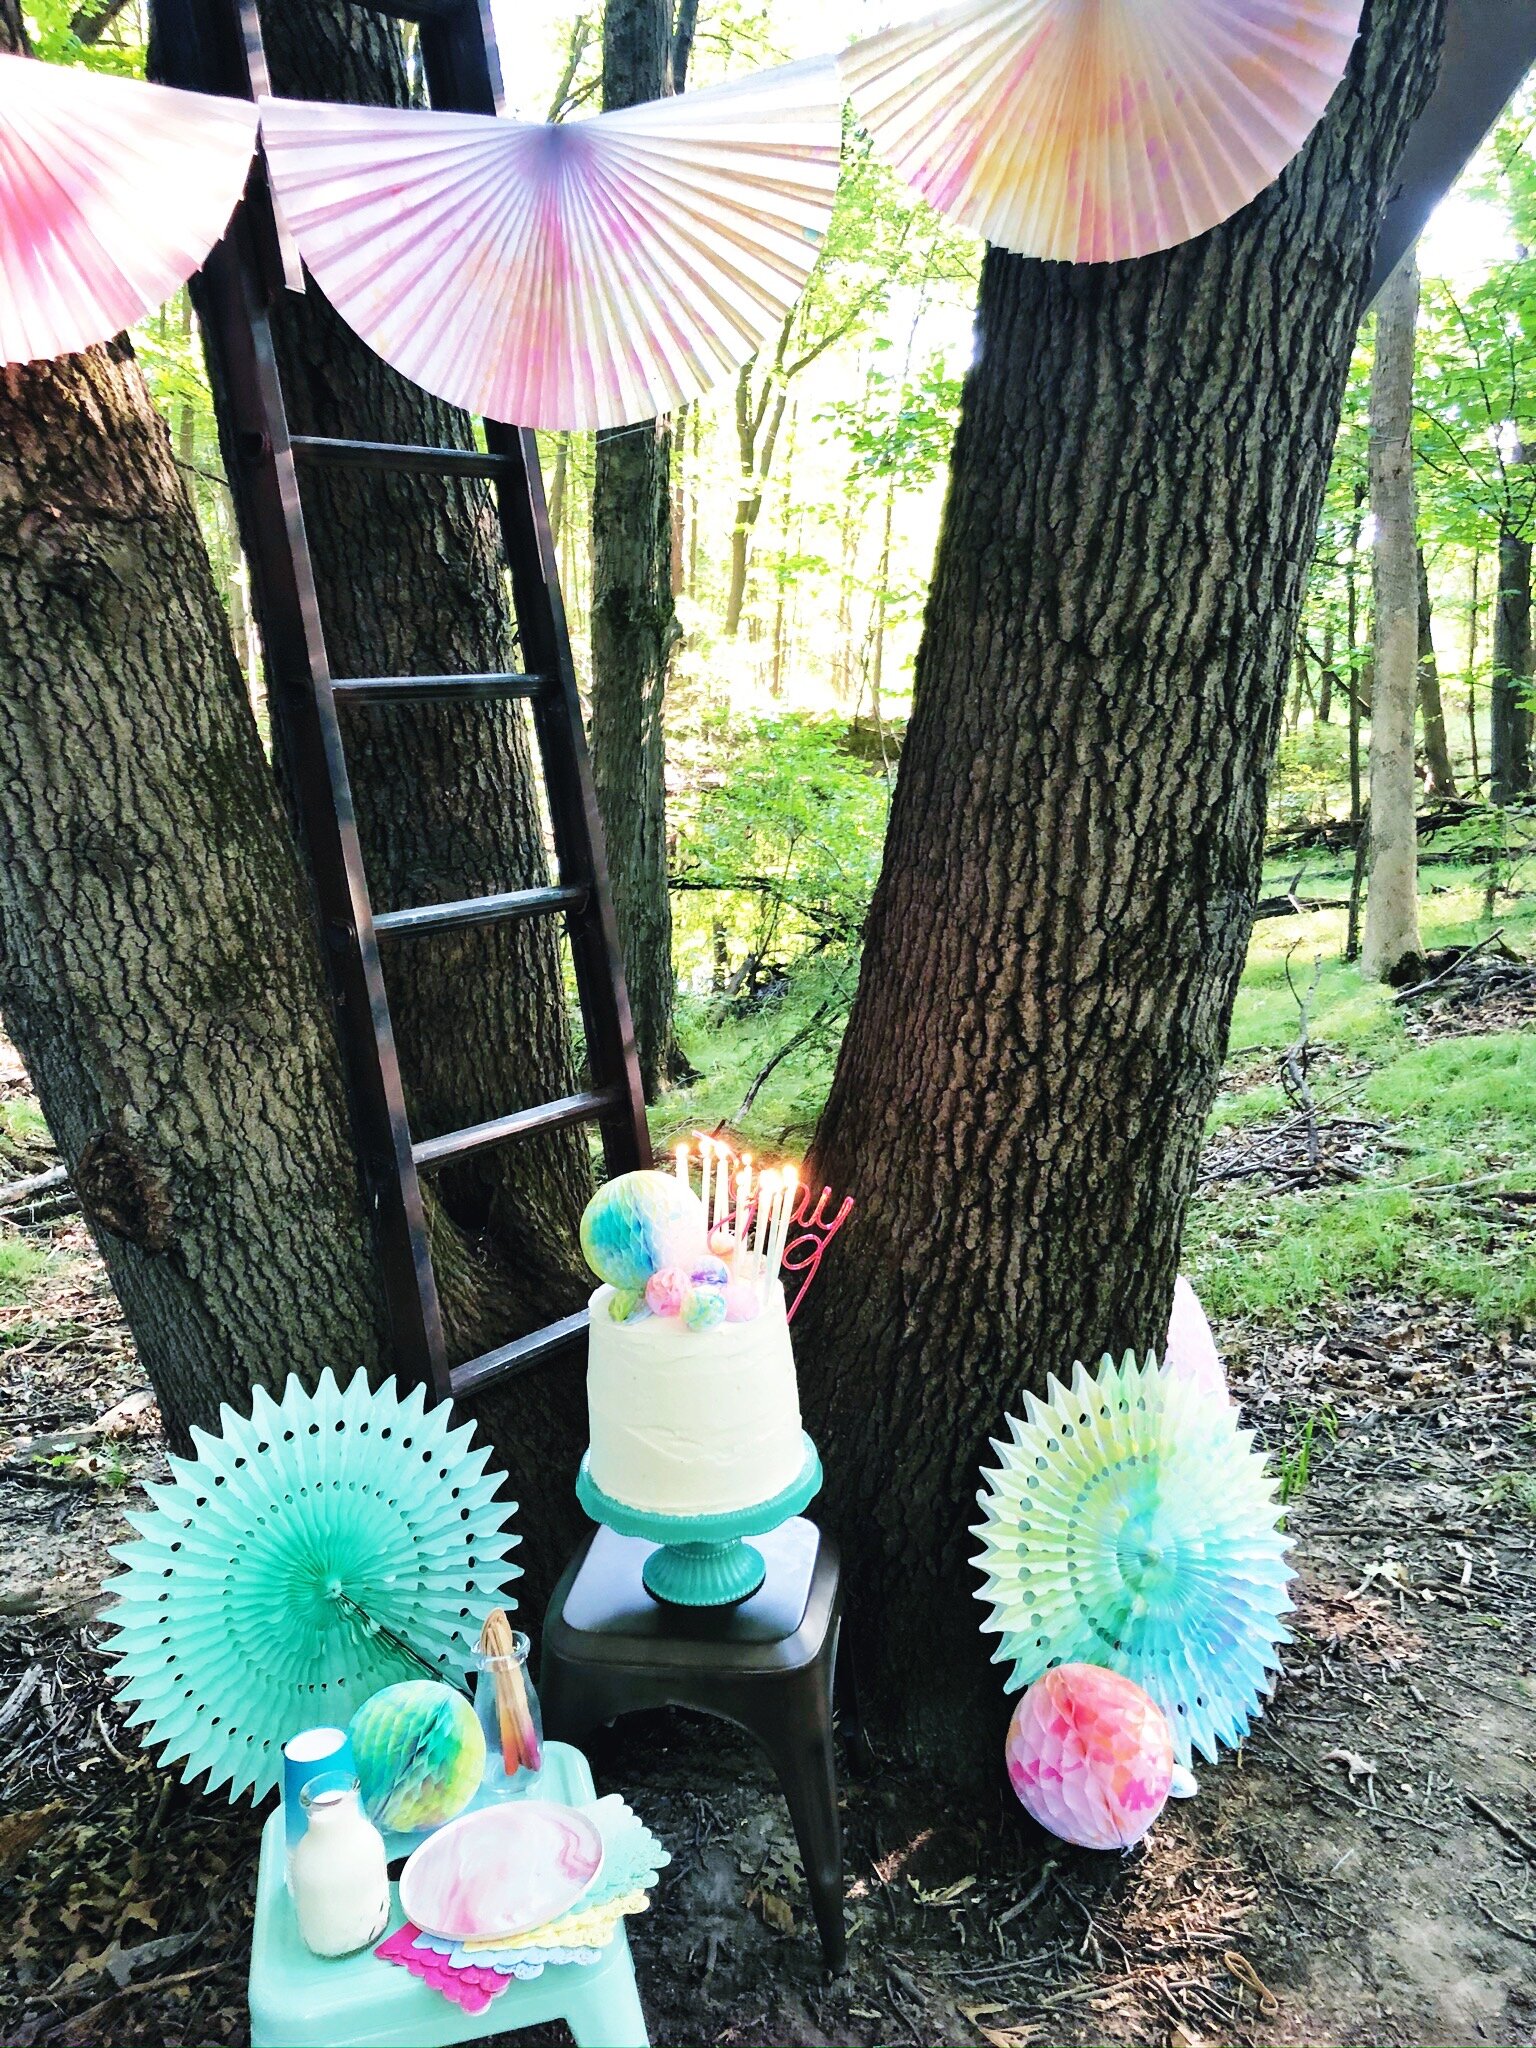
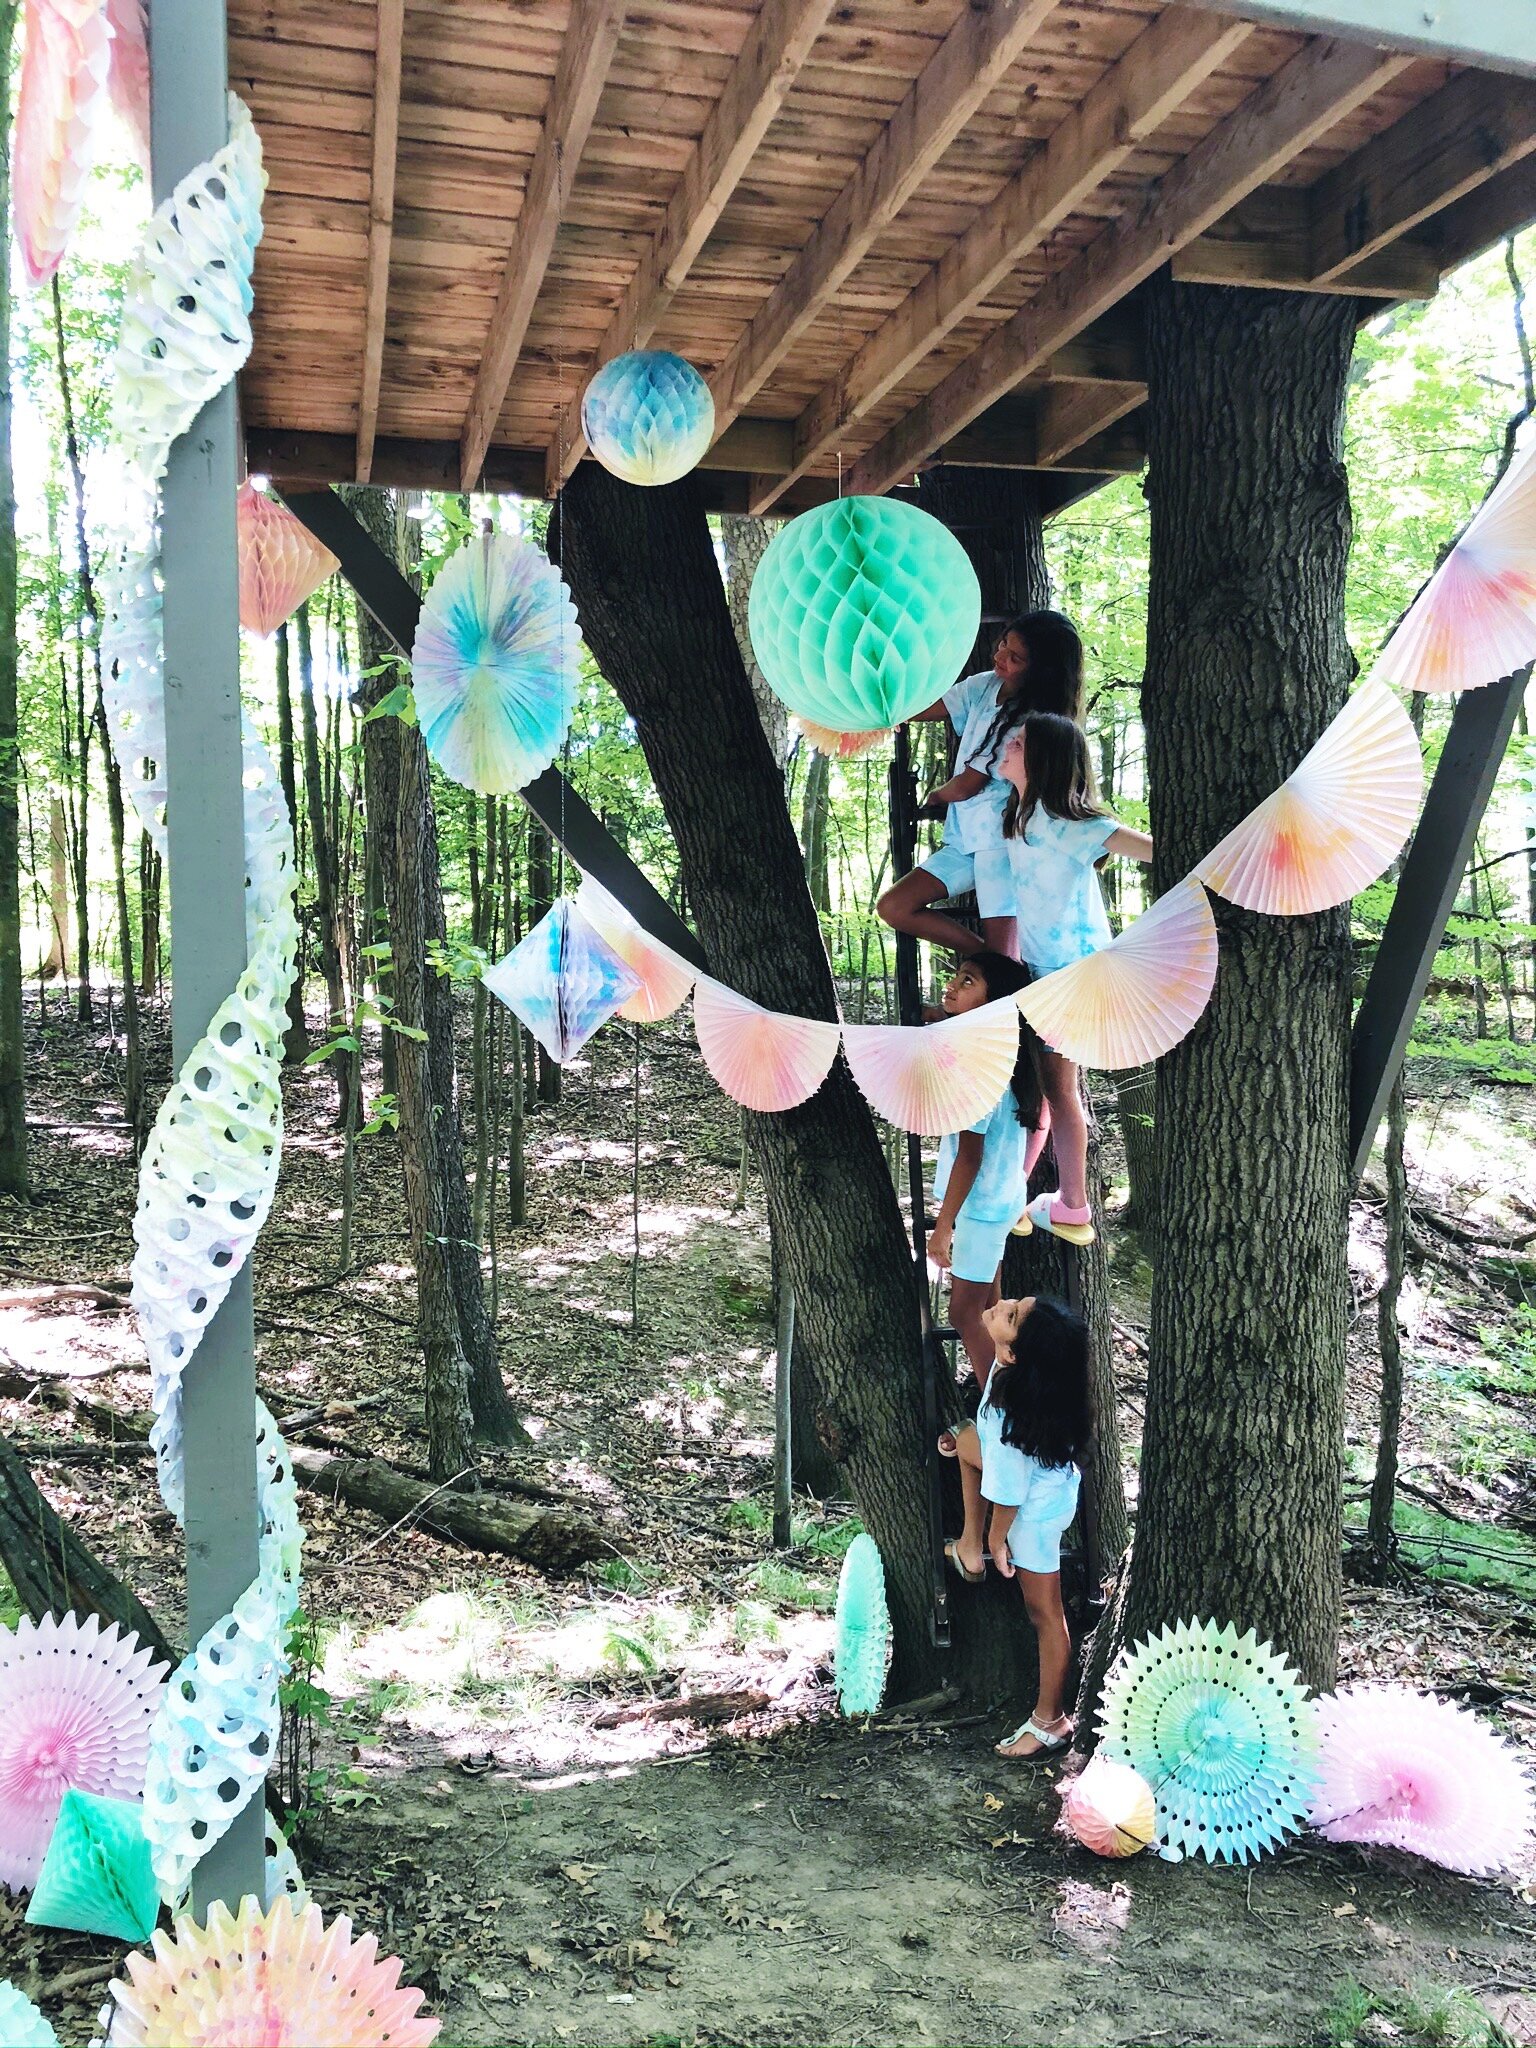
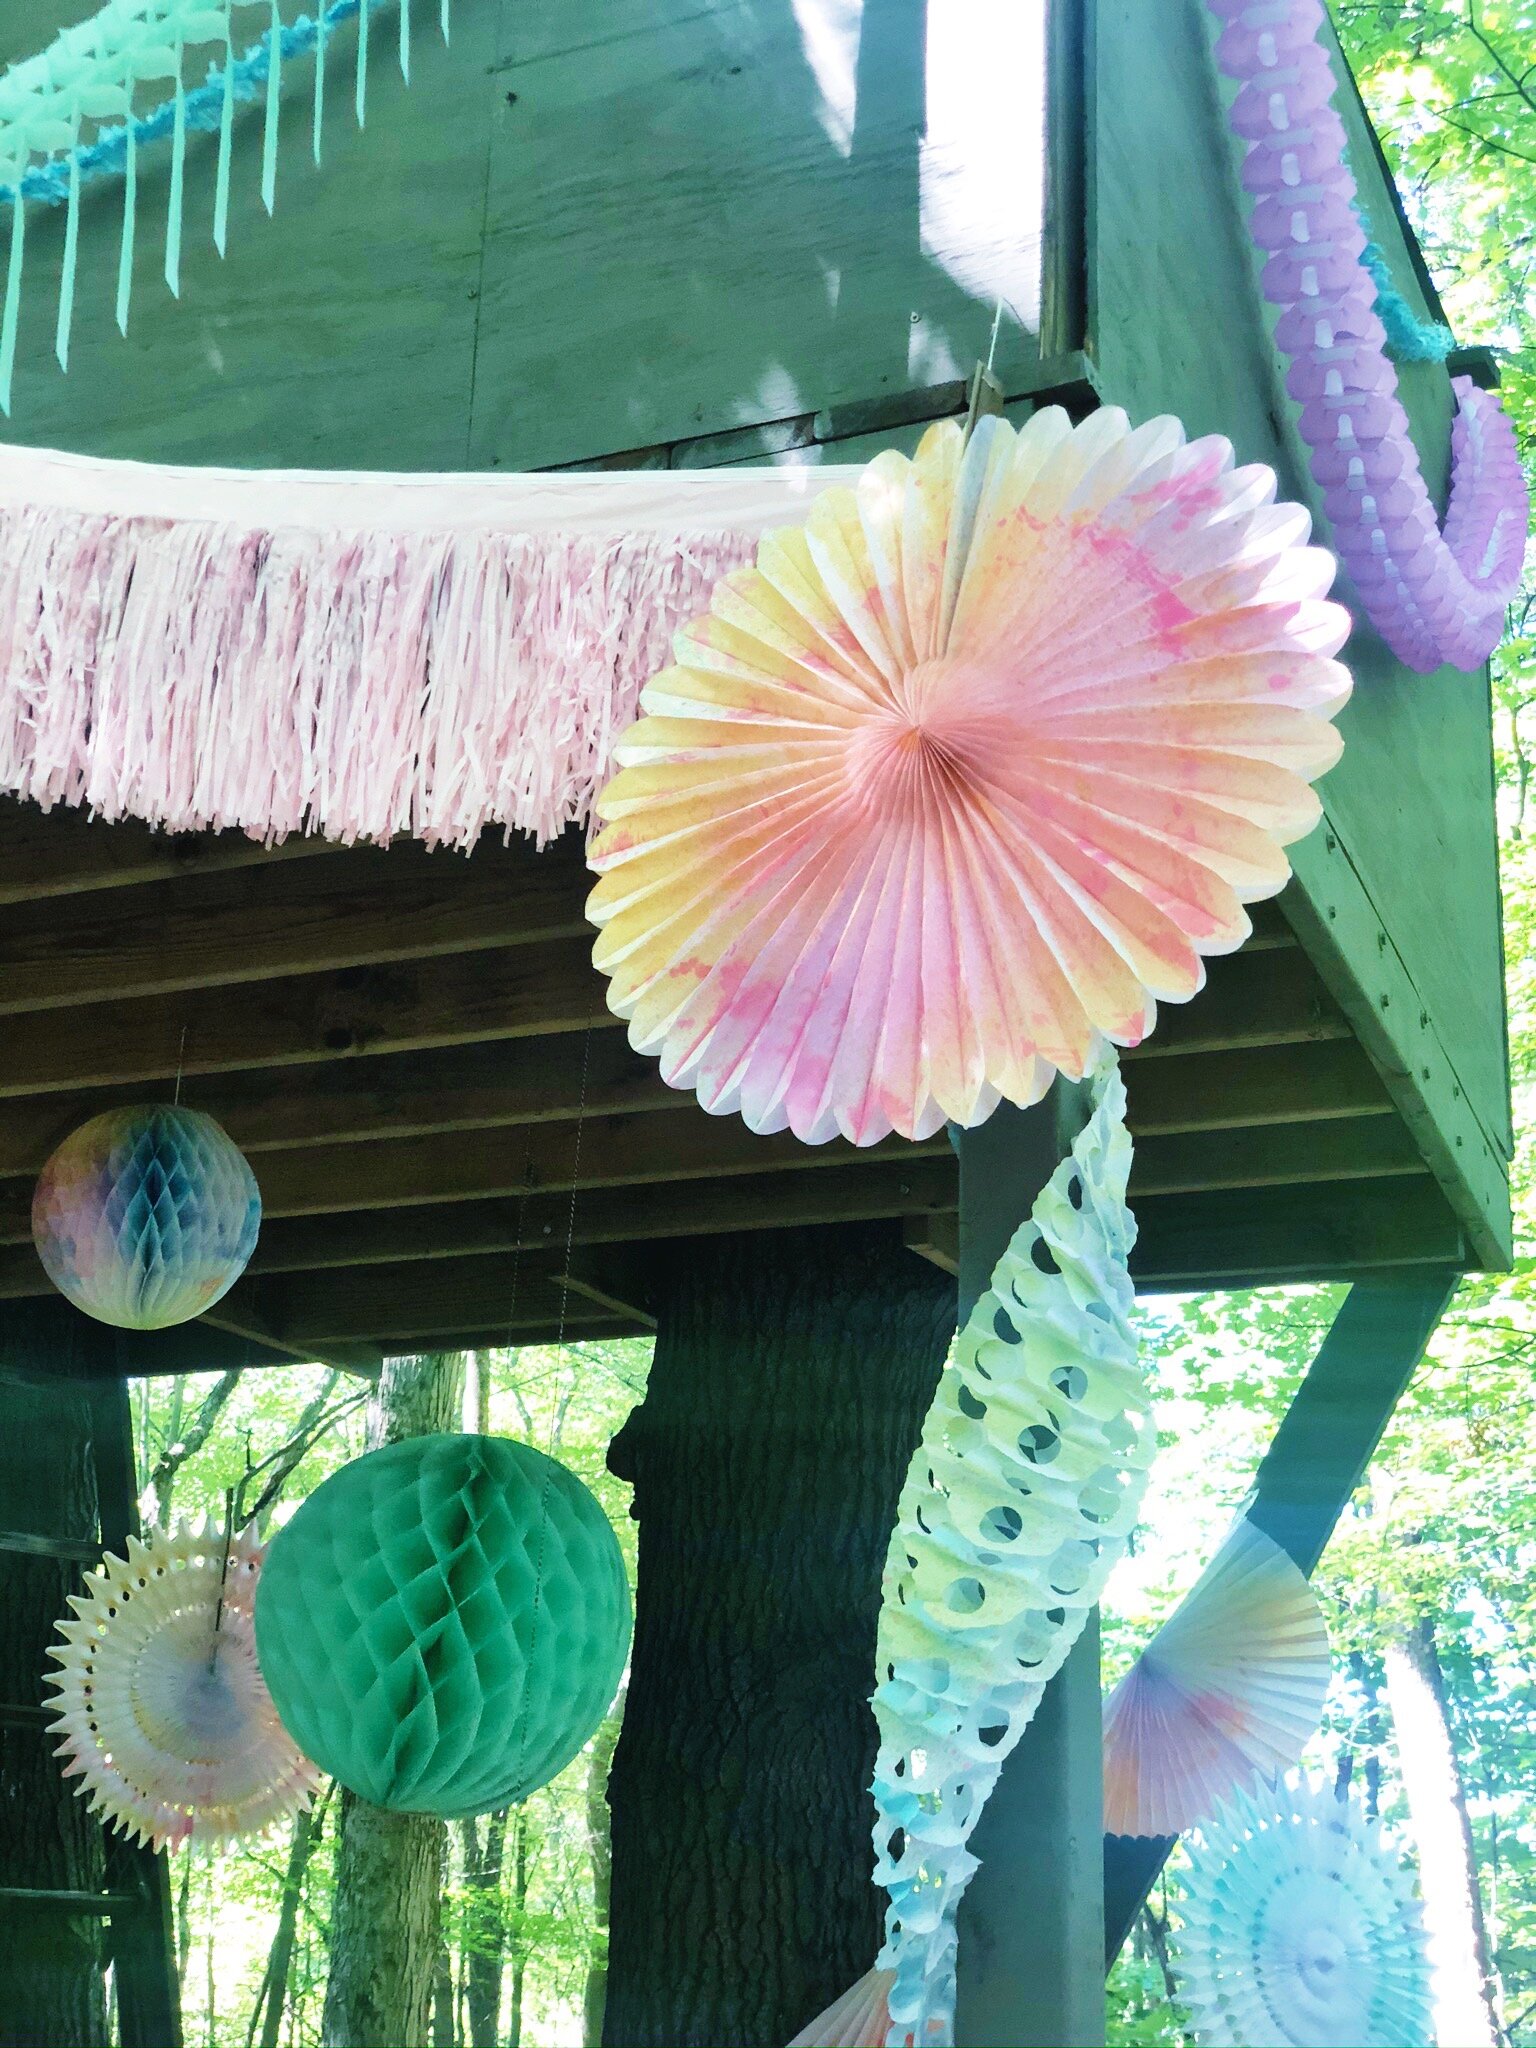
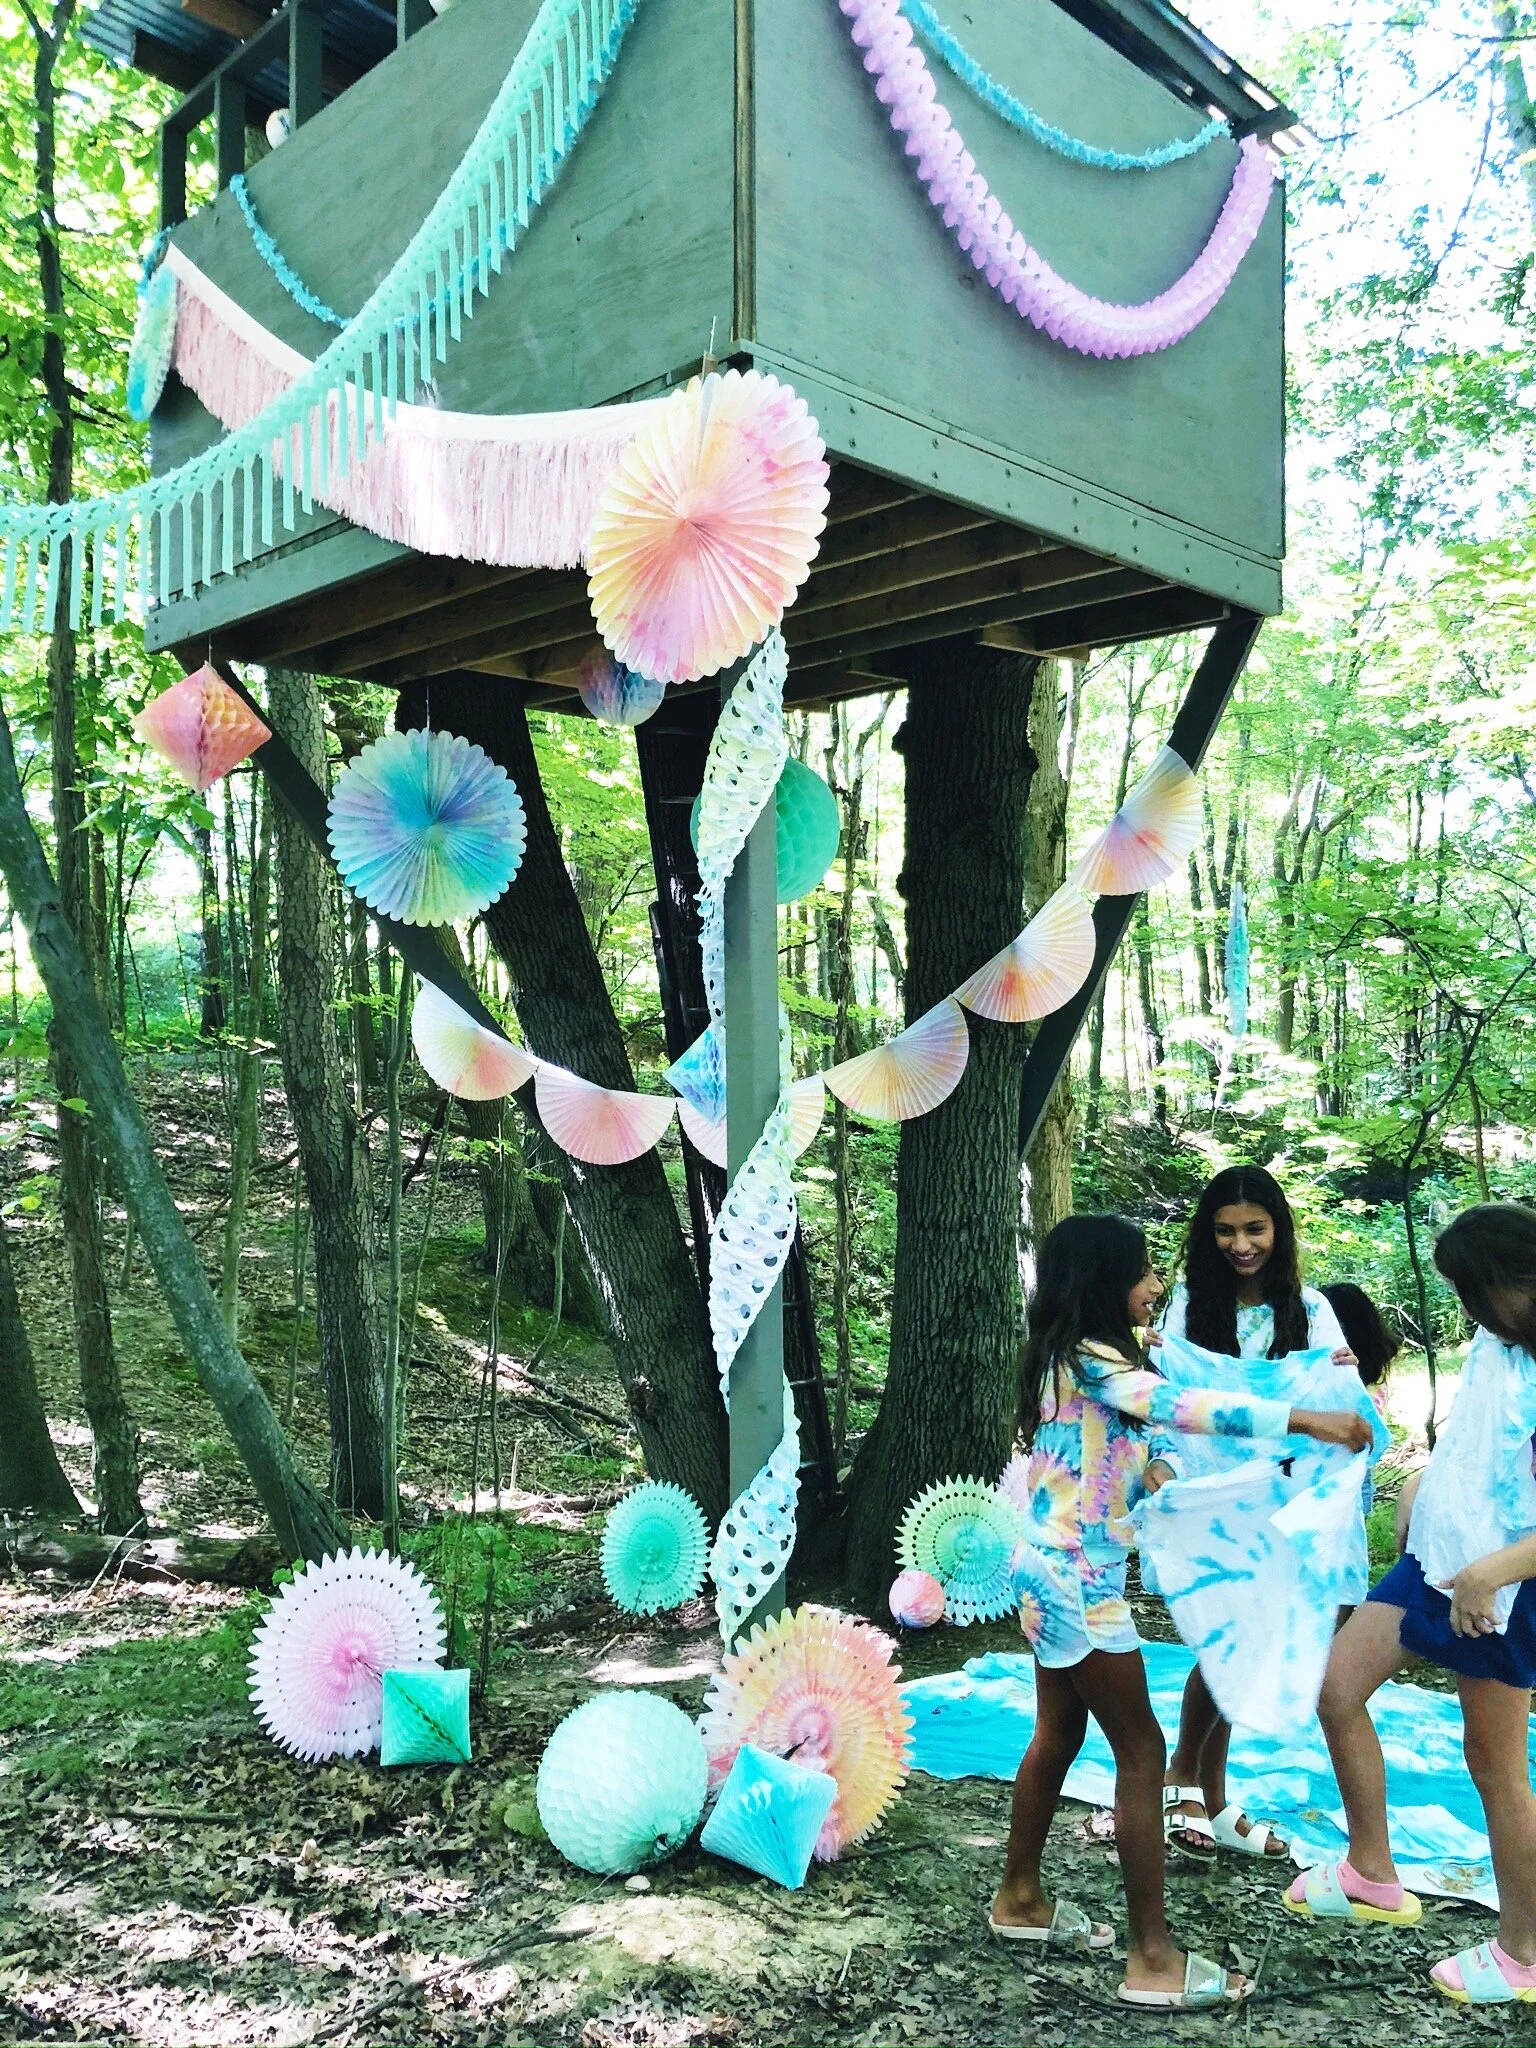
I love a contrasting backdrop for decor, so this rustic and foresty treehouse made for a great background for all the whimsical and lively colors. When placing your decor, stagger the heights of the honeycombs and fans, cluster various shapes and sizes, and avoid symmetry to give a more effortless and whimsical feel. Layer your garlands with contrasting textures… again, asymmetry is your friend here! With outdoor events, I love using decor with movement, like fringe and tassels.. it looks great when it catches the wind, and your pictures will look more lively!

Now for the garbs. We bought the biker shorts sets from the kids section at Target: biker shorts ($5… a size XL fit me as a 0/2 and would probably fit up to a size 4!), and these boxy white t-shirts (I bought an XXL, size 18-20). We also found kids jogger sets on Zulily, but you can also check Amazon or Walmart. My sister and I also bought these Cat & Jack Bralettes (in XL), and they turned out SO cute! A sweatshirt + biker short combo would be very cute (and is probably in my near future to complete my set), and very model-off-duty-esque!


I love to live vicariously through my nieces whenever possible, and since I always wanted a treehouse growing up and my brother-in-law recently built one for the girls, so this ‘shehouse’ is where our party was based!

We did our clumping and bunching inside the treehouse. For this step, you definitely want a LOT of rubber bands. Whatever you think you need… triple it!


We more or less followed the WeWoreWhat Tie-Dye Tutorial because I liked that her final products were more subtle (we actually followed the video tutorial in her Instagram story highlights). The only minor differences is that we didn’t use bleach, and we rubber banded both sides. The more clumps and clusters you do, the better your patterns will turn out.

We took the party down below the treehouse for the dyeing on top of a paper linen tablecloth. (my plan was to tie-dye this before the party and use on a table, but…I forgot!). The blue set we made with RIT Tropical Teal Dye , and the peachy blush/nude set was made with RIT Sandstone Dye. If you want white streaks in your creation, do not completely submerge in the dye solution, but submerge if you want a more monochromatic look. The spray bottles were from Walmart. Make sure you wear rubber gloves for this step, the dye will stain your hands!

We decided this was going to be a family affair, and all present adults and grandparents got in on the action too!


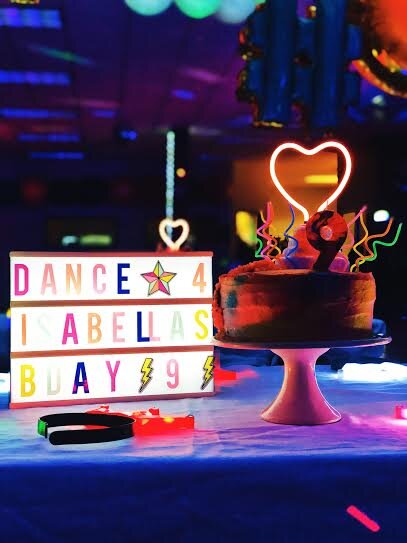
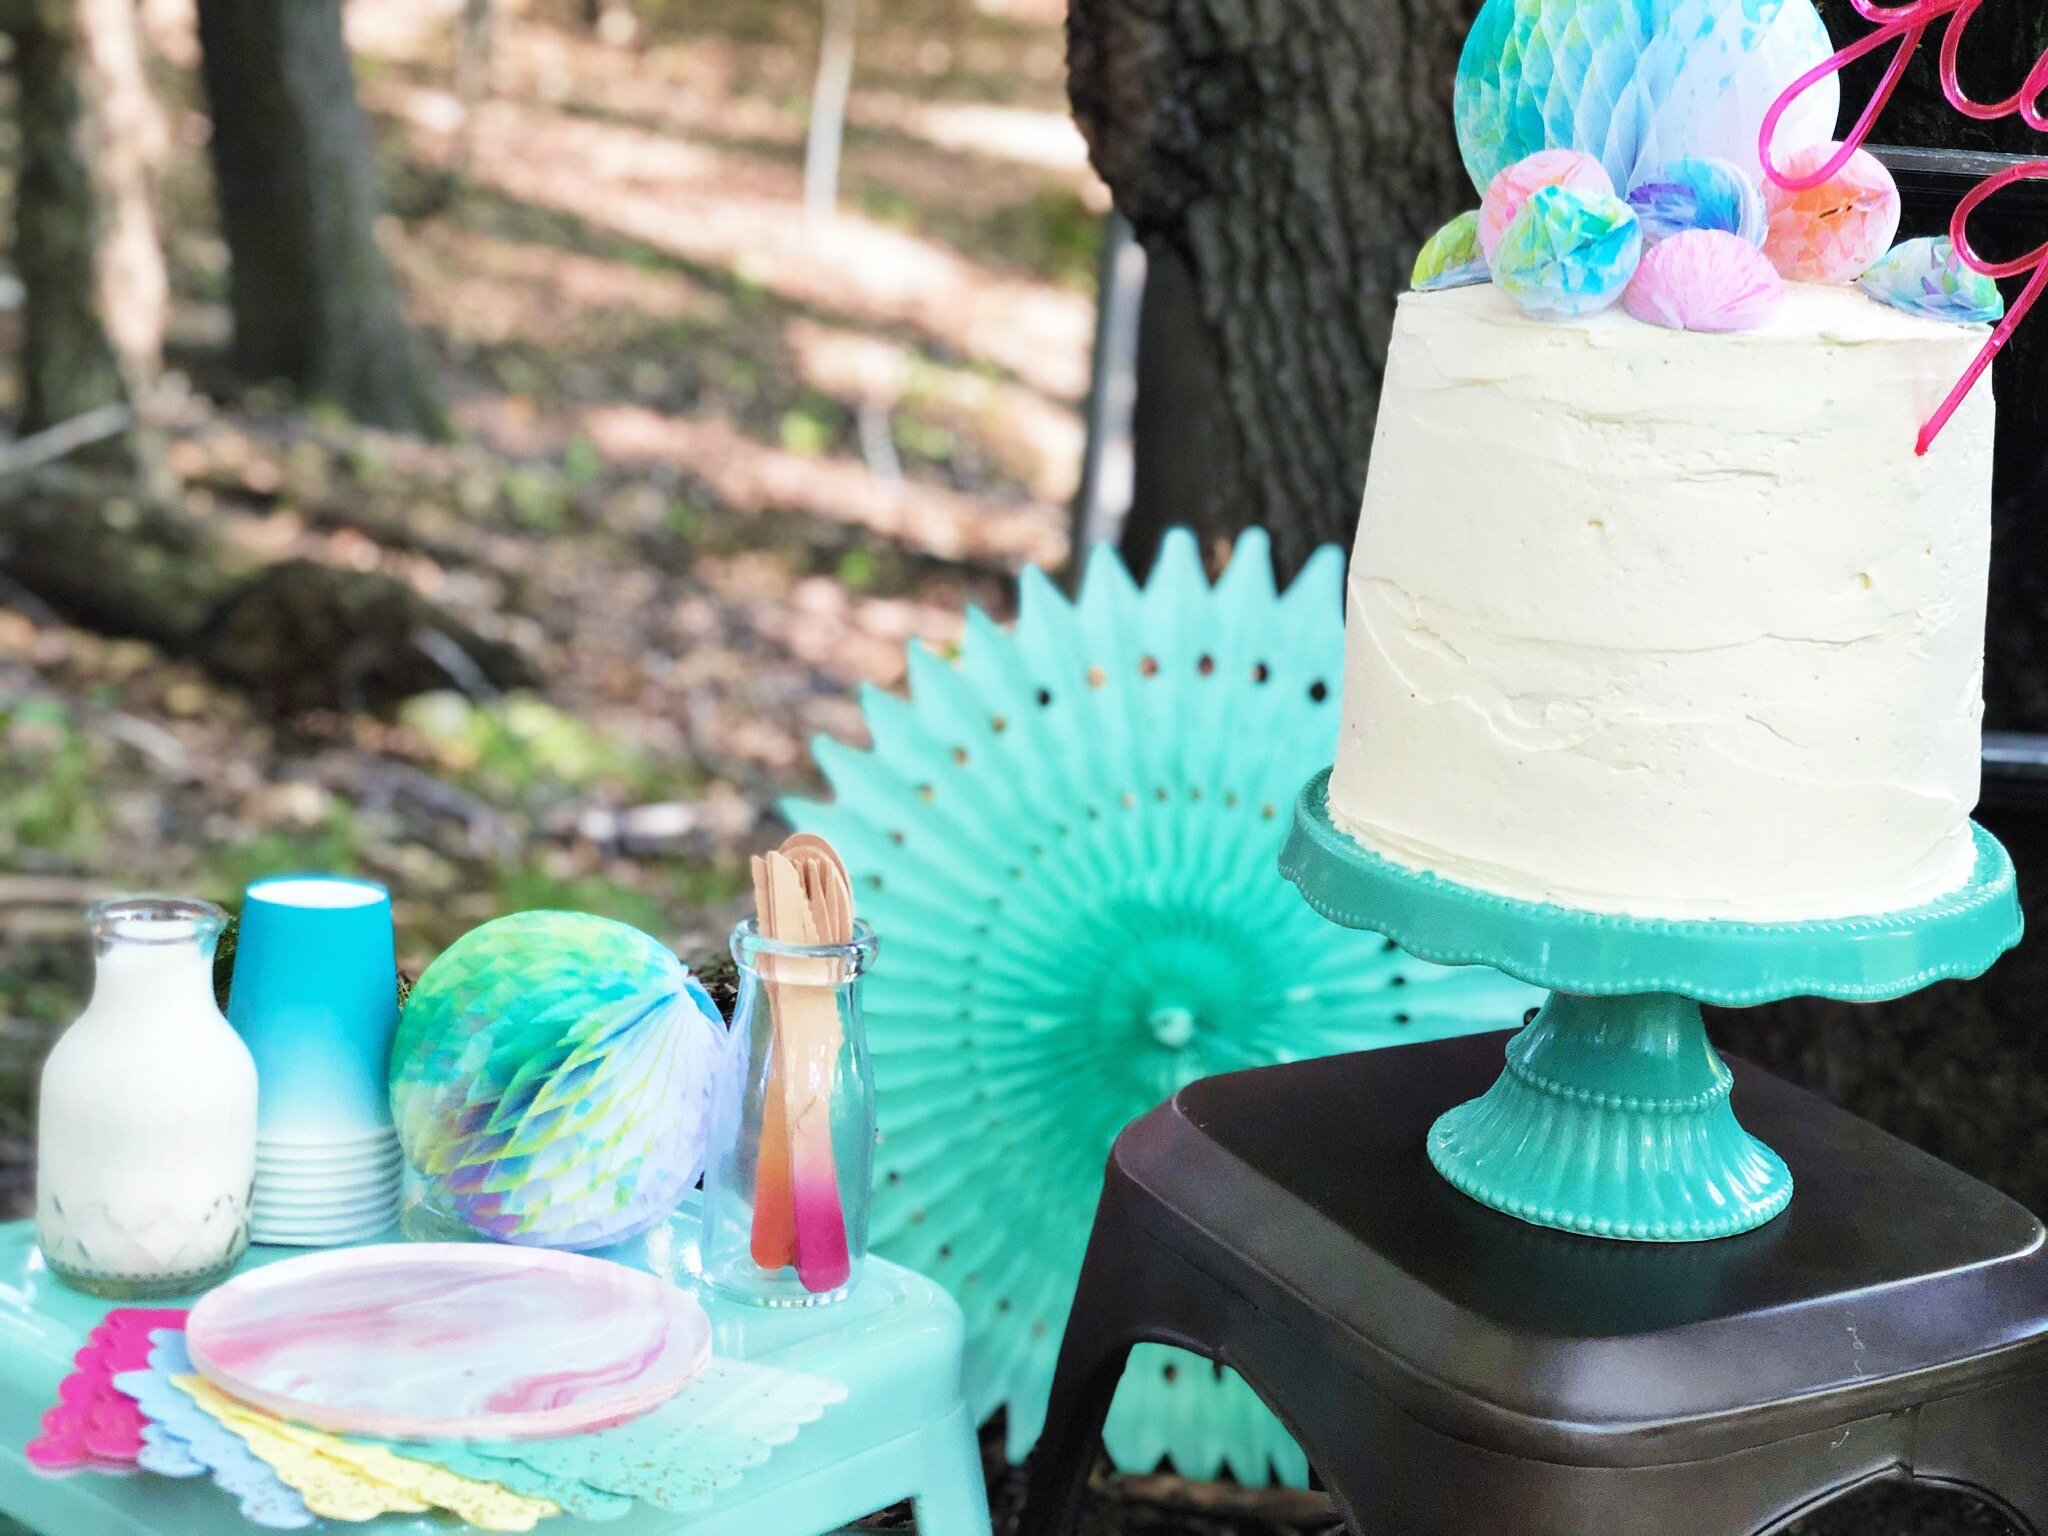
The 2” & 5” honeycombs were so tiny and cute that I decided to use them to top a plain white cake. The 2” balls are very delicate, so be sure not to saturate them when dying. The hot pink color pop “yay” was actually a straw from Target, but you can find a similar version here. The candles were technically “marbled”, but I thought they had a tie-dye look to them.


This party is great option for covid-safe(r) fun because it is best done outdoors, and with gloves on! And trust me, most dyes will stain your hands, so you are going to want to use gloves!

We tie-dyed on top of the OHD Paper Linen Tablecloth in white, and if you handle it carefully, you will end up with a sweet tie-dye tablecloth!

All the decor & tabletop products from this setup are exclusively from the Oh Happy Day Party Shop! Click the links below; I have also itemized the quantities, sizes, and colors from the setup above! If you do this party, please share your pictures with me, or tag @feteandfinery on instagram!

OH HAPPY DAY PARTY SHOP SUPPLIES
[White Tissue Decor for Dying]
Tissue Paper Fan 21" (Color: White, Pink, Mint Green)
Tissue Paper Fan Deluxe 27" (Color: White)
Honeycomb Diamond 12" (Color: 2x White, Mint Green, Light Blue)
Honeycomb Diamond 18" (Color: White)
Honeycomb Puff 14” (Color: Mint Green, Lavender)
Honeycomb Mini Balls 2" (Color: White - for cake topper)
Honeycomb Ball 5" (Color: White)
Honeycomb Ball 8" (Color: White)
Honeycomb Ball 12" (Color: White, Light Pink)
Honeycomb Ball 19" (Color: Mint Green)
[Garlands]
Full Garland (Color: White)
Bunting Fan Garland (Color: White)
Streamer Garland (Color: Mint)
Festive Festooning (Color: Light Blue)
Criss Cross Garland (Color: Lavender)
Paper Fringe Garland (Color: Light Pink)
[Tabletop]
Marbled Candles (Color: Mint)
Oh Happy Day Pink Marble Plates (Small) (Color: Pink Marble)
Oh Happy Day Ombre Cups (color: Sky)
Paper Linen Tablecloths (Color: White)
Tropical Ombre Wooden Cutlery (Color: Tropical Ombre)
Ombre Napkins, Small (Color: Multicolor)
To see more socially distant Party-in-Place tutorials, click the images below: